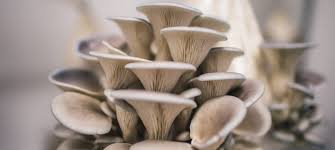
How to Grow Oyster Mushrooms at Home
Learning how to grow oyster mushrooms at home can be a fun and rewarding experience. Through careful preparation, choosing the right variety, and following essential steps, bountiful mushroom harvests can be achieved. Below, each stage of the growing process is described to help you along the way.
Step 1: Get Prepared
To begin the process, a decision about which oyster mushroom variety to grow must be made. Below are some popular options:
- Pearl Oyster Mushroom (Pleurotus ostreatus): Also known as the common oyster mushroom, this variety grows best in colder temperatures.
- Blue Oyster Mushroom (Pleurotus ostreatus var. columbinus): Recognized for its fast colonization, it thrives in temperatures of 45-65°F (12-18°C).
- Phoenix Oyster Mushroom (Pleurotus pulmonarius): Often called the summer oyster, it is suited for warmer climates.
- Golden Oyster Mushroom (Pleurotus citrinopileatus): With its vibrant yellow color, it resembles chanterelle mushrooms and prefers temperatures of 64-86°F (18-30°C).
- Pink Oyster Mushroom (Pleurotus djamor): Known for quick fruiting within 3-4 weeks, it grows best in warm environments.
- King Oyster Mushroom (Pleurotus eryngii): Valued for its meaty texture, it is more challenging to cultivate and performs better in cooler climates.
Step 2: Choose a Substrate
Next, a suitable substrate must be selected. A substrate provides the nutrients needed for mycelium growth, which functions similarly to roots in plants. Straw is the most commonly used option, but alternatives like sawdust, coffee grounds, and agricultural byproducts (such as sugarcane bagasse and cotton waste) are also effective. For beginners, wood pellets are recommended since they come pre-pasteurized and require only water to hydrate.
Step 3: Order Supplies
After the substrate has been chosen, essential supplies will need to be ordered. Mushroom spawn, which serves as the seed for the growing process, should be purchased. Grain spawn is recommended over sawdust spawn as it tends to produce higher yields. Additionally, growing bags or containers must be acquired. Purpose-made mushroom cultivation bags, available online, are ideal because they facilitate air exchange while preventing contamination. If these are unavailable, buckets or freezer bags with small holes can be used as alternatives.
Step 4: Prepare the Substrate
The selected substrate must now be prepared to create the ideal environment for mycelium growth. When using straw or cardboard, pasteurization is required by soaking the material in hot water or a lime bath. Sawdust pellets, on the other hand, can be soaked with water to break them down into usable form. Fresh coffee grounds can also be utilized but should be used within 24 hours to avoid contamination by mold.
Step 5: Inoculate the Substrate
Once the substrate is ready, the inoculation process begins. During this step, the mushroom spawn is added to the prepared substrate. It is important that the substrate is neither too dry nor too wet. The ideal moisture level can be tested by squeezing the substrate to ensure only a few drops of water are released. After the substrate and spawn are mixed, they should be transferred into the growing containers and secured.
Step 6: Incubation
The next phase involves incubation, where mycelium will spread throughout the substrate. To ensure successful incubation, the containers should be placed in a warm (20-24°C) and preferably dark space, such as a cupboard or boiler room. Within a few weeks, the substrate should become fully colonized, indicated by a white coating. If contamination by green or blue mold occurs, restarting with a new substrate may be necessary.
Step 7: Fruiting
Once the substrate is fully colonized, conditions for fruiting should be created. At this point, the mycelium will begin producing mushrooms as it runs out of food. Indirect light, proper air exchange, and regular humidity are essential for fruiting. Slits or holes in the bags will help trigger mushroom growth by exposing the mycelium to fresh air. Spraying with water twice a day will maintain humidity, while room temperature should be kept within the range suitable for the selected variety.
Step 8: Harvesting and Reusing the Substrate
When the edges of the mushroom caps begin to flatten or curl upwards, it is time for harvesting. Mushrooms can be twisted off by hand or cut with a knife. To encourage a second crop, the substrate can be rehydrated by soaking it overnight and following the fruiting instructions again. A third crop is sometimes possible before the substrate runs out of nutrients, after which it can be composted or used as garden mulch.
Health Benefits of Oyster Mushrooms
In addition to being easy to grow, oyster mushrooms offer many health benefits. They boost the immune system, contain antimicrobial properties, and provide rich sources of protein and vitamins. Furthermore, they are cholesterol-free and have antiviral effects, making them a nutritious addition to any diet.